
Today, most of the houses in America are supplied with central air conditioning. But, there are people who may not have enough space for this type of system. They are forced to use window units or even an outdated cooling systems such as a swamp cooler. This is why installing a mini split air conditioner is great solution for them.
The Basics of Mini Split Air Conditioning
If you’re considering a mini split air conditioner for your home, you’re probably wondering how the installation process works. Here’s a quick overview of the basics to help you get started.
- Choose the right location for your mini split unit. It should be placed on an exterior wall that gets direct sunlight, away from any trees or other obstructions.
- Cut a hole in the exterior wall for the air intake and exhaust pipes. The size of the hole will depend on the size of the unit you’re installing.
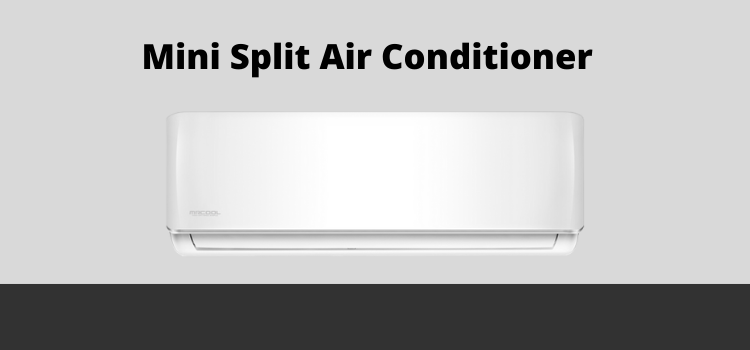
- Install the indoor unit on an interior wall, near the ceiling. Again, the exact location will depend on the size of your unit.
- Connect the indoor and outdoor units with the air intake and exhaust pipes. Make sure all connections are tight and sealed with caulking or weatherstripping.
- Turn on the power to the unit and test it out!
The Different Components of a Mini Split System
A mini split air conditioner is made up of four main components: an outdoor compressor/condenser, an indoor air handler, a remote control, and connecting refrigerant tubing. Here’s a brief overview of each component and what it does:
Outdoor Compressor/Condenser: This is the part of the system that sits outside your home. It contains the compressor, which pumps refrigerant to the indoor air handler, and the condenser, which releases heat from the refrigerant.
Indoor Air Handler: This is the part of the system that sits inside your home. It contains the evaporator coils, which remove heat and moisture from the air, as well as a fan to circulate air through the coils.
Remote Control: This allows you to adjust the settings on your mini split system from anywhere in the room.
Connecting Refrigerant Tubing: This tubing connects the outdoor compressor/condenser to the indoor air handler. It carries refrigerant back and forth between the two units.
How a Mini Split System Works
A mini split system is a great way to cool your home without the use of a central air conditioner. Mini split systems are easy to install and can be done in just a few steps. Here are the five steps on how to install a mini split system:
- Choose the right location for your mini split system. The location should be close to an exterior wall and near an electrical outlet.
- Drill a hole in the chosen location for the conduit pipe. The conduit pipe is what will connect the indoor and outdoor units of the mini split system.
- Connect the indoor and outdoor units of the mini split system using the conduit pipe. Make sure that the connection is secure.
- Install the outdoor unit of the mini split system on a stable surface. The outdoor unit should be level so that it does not vibrate when in use.
- Turn on the power to the mini split system and test it out! Make sure that all connections are secure and that there are no leaks before using your new mini split system.

How an HVAC Contractor Installs a Mini Split System
As the weather begins to warm up, many homeowners are thinking about ways to keep their homes cool and comfortable during the summer months. One option that is becoming increasingly popular is installing a mini split air conditioner. Mini split systems are relatively easy to install, and they can provide effective cooling without taking up a lot of space.
If you’re considering installing a mini split system in your home, it’s important to hire a qualified HVAC contractor who has experience with this type of installation. The contractor will need to assess your home’s cooling needs and determine the best location for the indoor and outdoor units. They will also need to properly seal and insulate all ductwork to ensure optimal efficiency.
Once the installation is complete, your HVAC contractor will test the system to make sure it’s working properly. They will also show you how to use the controls and care for the unit so that it continues to work effectively for years to come.
Why are Mini Splits the Best Choice for Homeowners?
There are many reasons why mini splits are the best choice for homeowners. They are energy efficient, they can be used in both heating and cooling mode, and they are very easy to install. Mini splits also offer a number of other benefits, including:
- Mini splits are very energy efficient. In fact, they are up to 40% more energy efficient than traditional central air conditioners. This means that you’ll save money on your energy bills each month.
- Mini splits can be used in both heating and cooling mode. This means that you can use them year-round to keep your home comfortable no matter what the weather is like outside.
- Mini splits are very easy to install. In most cases, you can do it yourself in just a few hours. This means that you won’t have to hire an expensive contractor to do the job for you.
- Mini splits offer a number of other benefits, including:
- They are very quiet. You won’t even know they’re running unless you’re standing right next to them.
- They don’t take up much space. You can install them in any room in your home, regardless of size
What to Expect During Installation
Installing a mini split air conditioner is not as difficult as it may sound. In fact, it is a relatively easy process that can be completed in just a few steps. Here is what you can expect during the installation process:
- The first step is to determine where you want to install the air conditioner. It is important to choose a location that is close to an electrical outlet and has enough space to accommodate the unit.
- Once you have selected the installation location, the next step is to mount the bracket that will hold the air conditioner in place. This can be done using screws or nails.
- The next step is to connect the air conditioner to the power source. This can be done by running an electrical cord from the outlet to the unit.
- The fourth step is to install the drainage pipe. This pipe will allow condensation from the air conditioner to be drained away from the unit.
- The final step is to turn on the air conditioner and enjoy cool, comfortable air in your home!
Everything You Need to Know About the Performance and Energy Efficiency of Mini Splits
When it comes to energy efficiency and performance, mini split air conditioners are one of the best HVAC systems on the market. If you’re considering installing a mini split AC in your home or office, here’s everything you need to know about their performance and energy efficiency.
Mini split air conditioners are very energy efficient. In fact, they are so energy efficient that they are often used in LEED certified buildings. That’s because mini splits don’t waste any energy in the process of cooling or heating your space. They also have a very long lifespan, so you won’t have to replace them as often as other HVAC systems.
In terms of performance, mini splits air conditioners are very quiet and offer great indoor air quality. They also provide even cooling and heating throughout your space, so you won’t have any hot or cold spots. And, because they don’t rely on ductwork, mini splits are easier to install than traditional HVAC systems.
Overall, mini split air conditioners are an excellent choice for anyone looking for an energy efficient and high-performing HVAC system. If you’re considering installing a mini split AC in your home or office, be sure to contact